How to Make a Mobile Whiteboard
This money saving whiteboard is based around using an inexpensive white wall panel like those used in residential bathrooms. One of our members has built a variety of these whiteboards, saving our church over $1,000 dollars. Basically, the construction consists of gluing the white wall panels to wooden frames and mounting them either on a wall or on a mobile stand. The actual whiteboards generally cost only about $10 each. You will spend more money on the frames. For a REALLY cheap whiteboard, you can just glue a board directly to a wall and put some molding around it. Be aware, however that this will ruin the wall when you try to take it down some day.
PROS: Large boards for a very inexpensive price.
CONS: Board material was not designed for heavy duty use. They will NOT last as long as a first quality board. You will need to replace these boards every few years so design the frame for easy replacement. I wouldn’t suggest this for a school setting in which it is used all day, several days a week but for a church setting in which they are used once or twice a week they are fine.
Whiteboard - Mobile
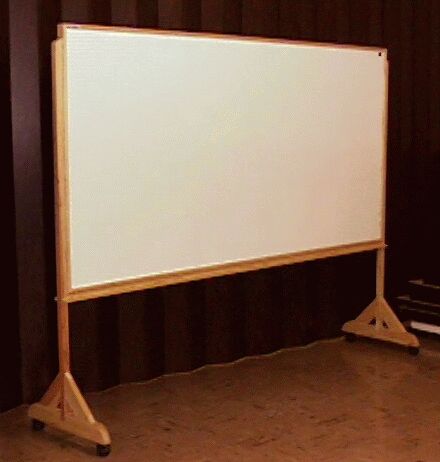
You will need a frame behind the board to keep it from warping. Glue the board to the frame so that you won't have screws in the markerboard.
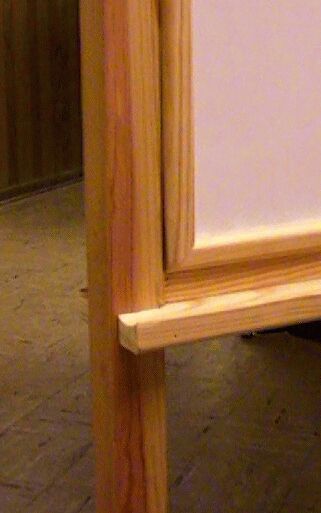
Edge View. Marker/eraser ledge at bottom. We have found it good to put a ledge at the top so that it is out of the reach of small children.
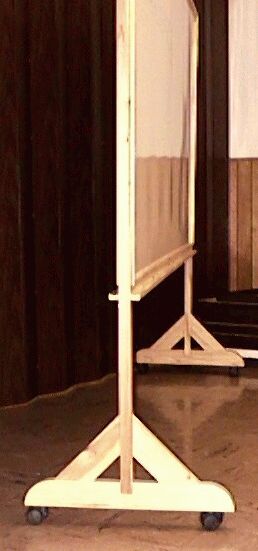
Edge view showing roller frame with wheels.
Instructions From The Builder
The two 1/8" sheets of bath board are glued to a 1 x 2 frame with 4' ribs on 24" centers. Simply lay one sheet down on a flat surface, glue one face of the strips, place them on the panel, apply glue to the face of these strips and drop the other panel on top. Use a sheet of 1/2" plywood as a press board and apply some dead weight evenly across the panel.( books, lumber, sand bags, etc.) It will only take a couple of hours to set if you use yellow carpenters glue.
Mean while make a 1 x 3 frame out of clear lumber and dado it 1" wide and a 1/4" deep to receive the panel package. You can mitre or butt joint the corners. When you are ready frame the panel. You have created a panel that cannot separate. The roller frame is 2 built of 2 x 2 clear material and is basically an upside down T with braces in the corners and casters on the extended cross bar. Don't make the frame taller than 6' 6" or it will not pass through a standard doorway!
Attach the two T frames to the ends of the panel with screws and you are ready to go. If you have a router with a core box bit you can make a double gutter pen tray out of a 1 x 4-1/2 to fasten to the bottom of the panel which will also stiffen the panel very well.